Payoneer is a New York-based financial services company that provides fast online money transfers and digital payments. A Payoneer account is the best alternative to PayPal, which charges less and guarantees better security.

How to open a Payoneer account? Step-by-step guide
First, if you have a Payoneer account, the company offers you a free MasterCard. You can use this Payoneer MasterCard to withdraw cash at any ATM. Many international companies, such as Google, Amazon, Airbnb, and Fiverr, use Payoneer as their primary payment method.
Steps to open a Payoneer account
Moreover, all necessary data for the Payoneer account
- Full name
- Identification card
- Email address
- Date of birth (same as on ID card)
- Full residential address (same as on ID card)
- Phone number (used for verification purposes)
- Bank account details (bank account with the same name as on the ID card
Step 1: Start selecting an account
Click on Sign up and earn $25.

Step 2: Select the desired field in the activity column
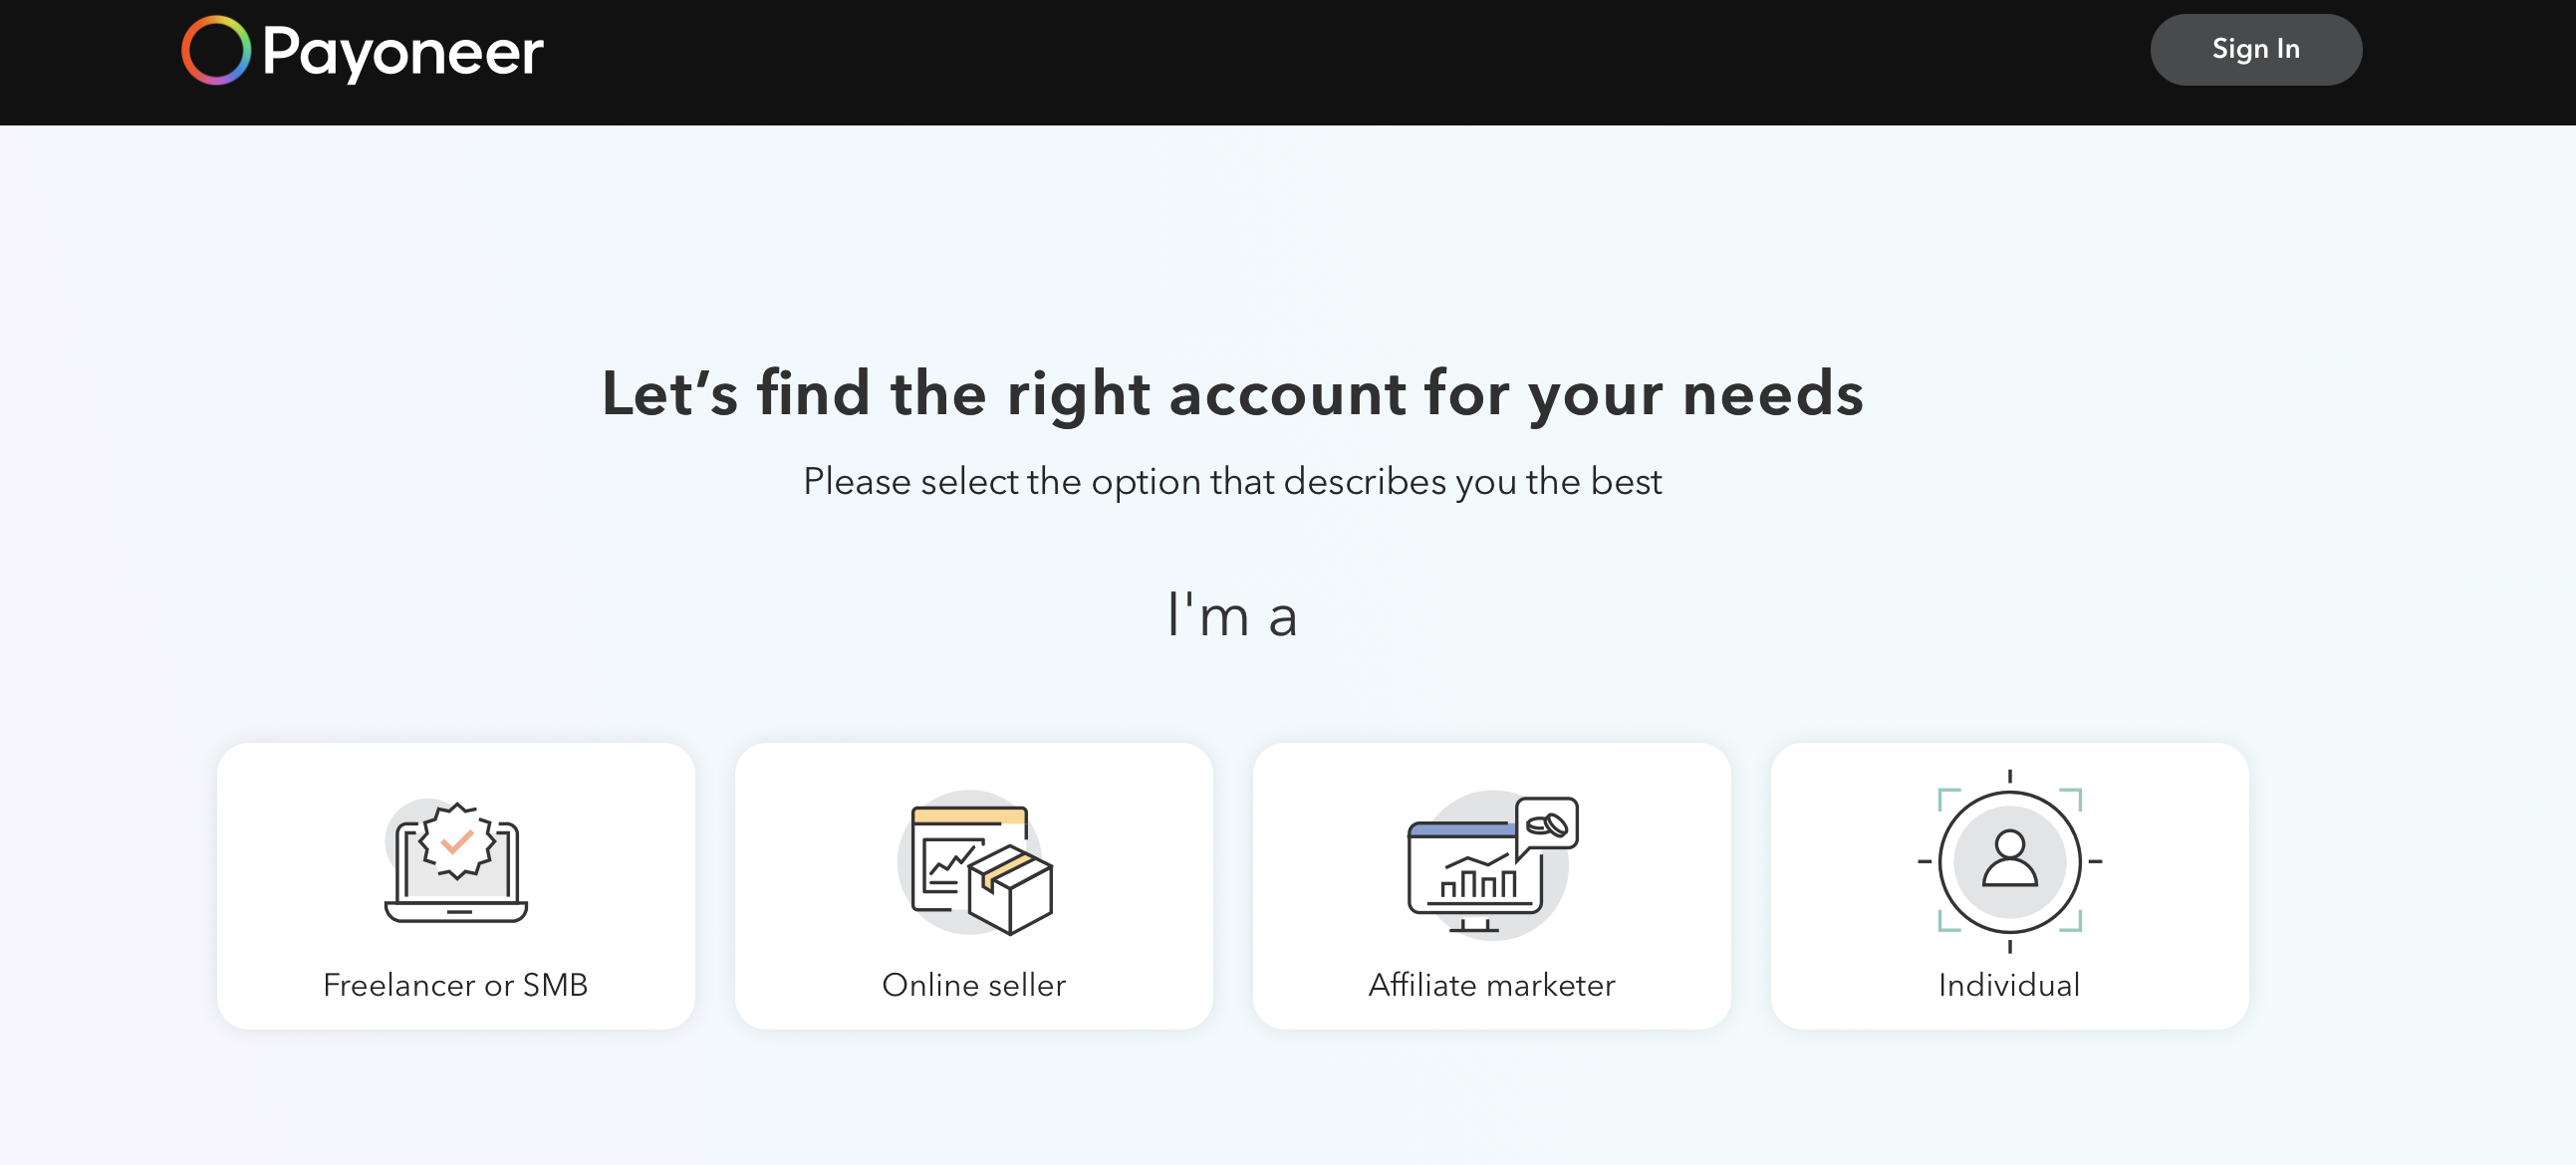
Next, you need to enter the criteria by which you can find the right account for your needs. Choose the option that best describes you.
Choose:
- Freelancer or SMB
- Online seller
- Affiliate marketer
- Individual
Step 3: Choose why you need an account
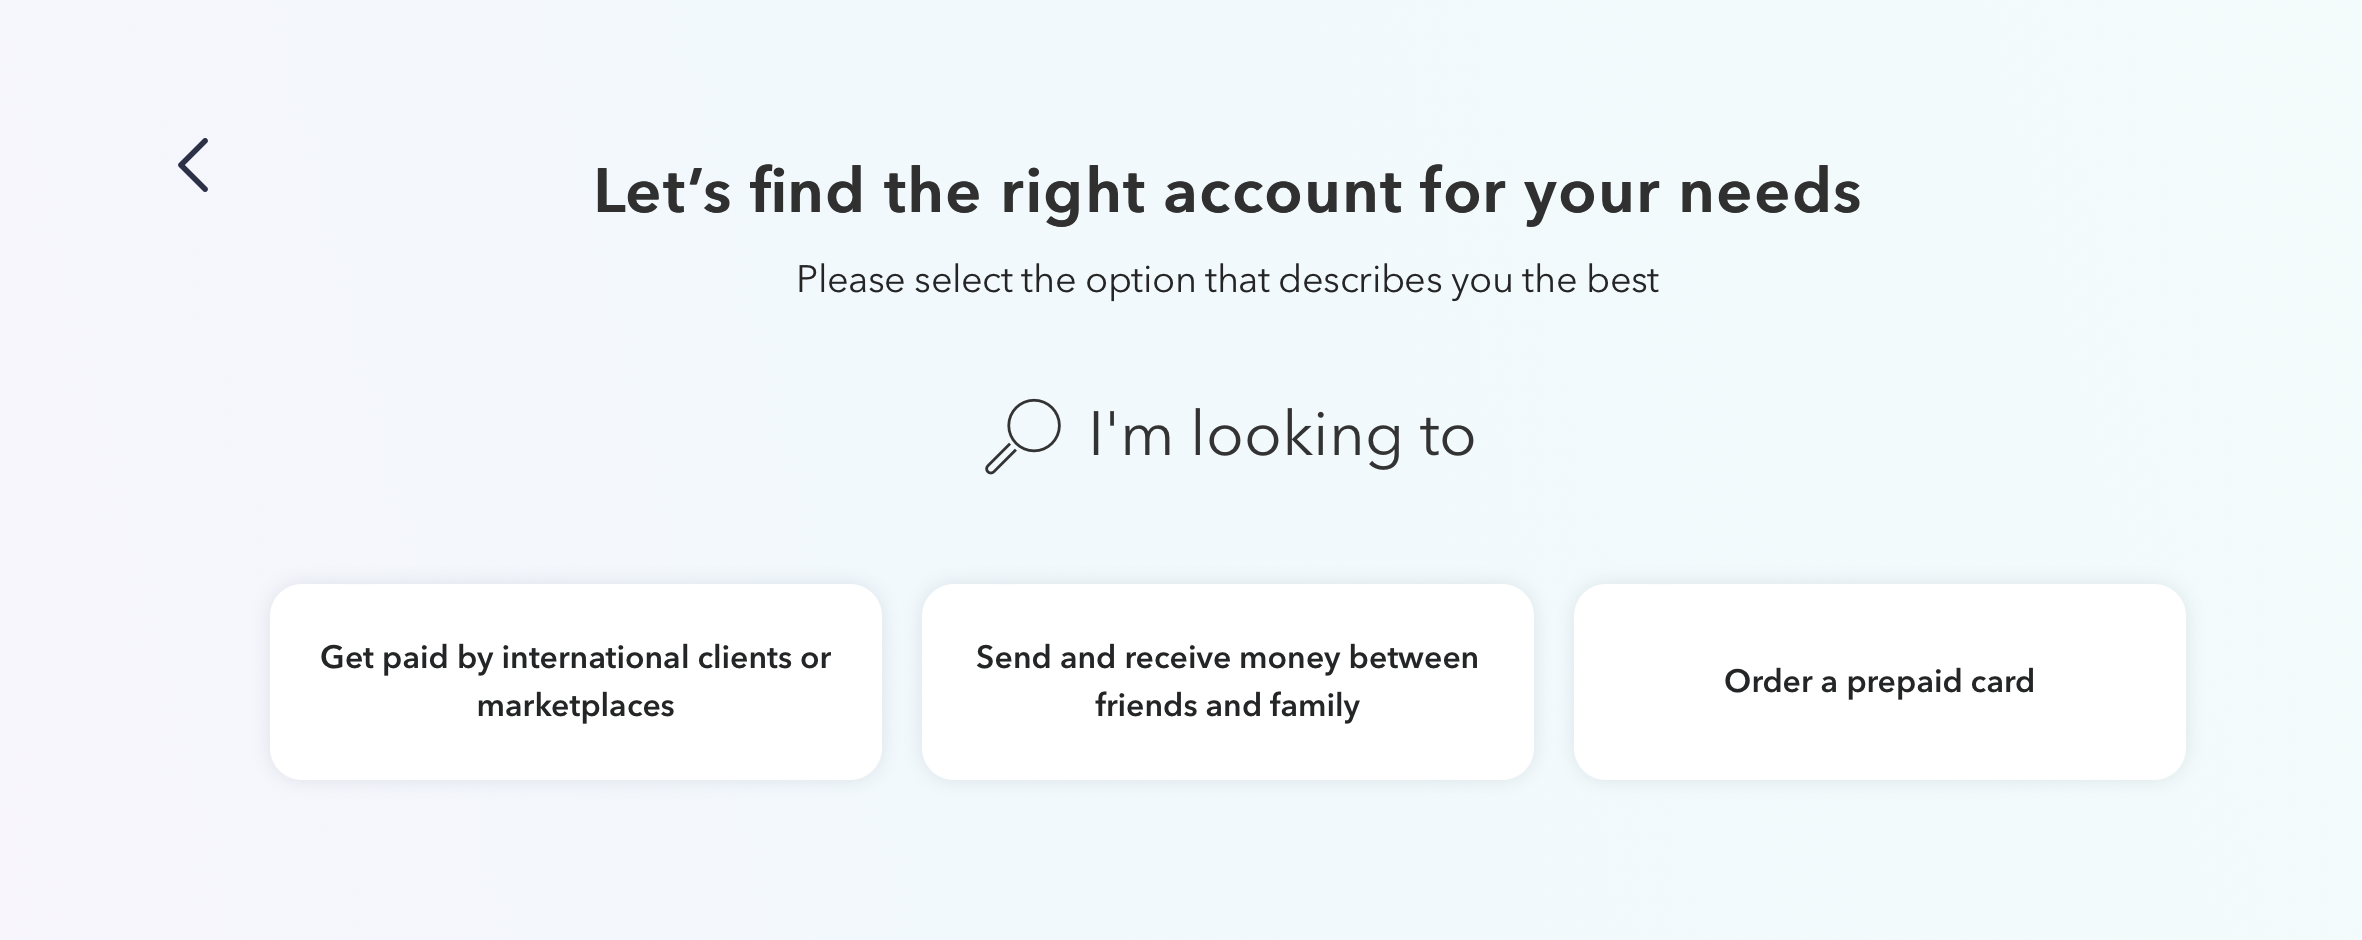
For example, we selected the Individual column.
Now we need to select the purpose of opening an account:
- Get paid by international clients or marketplaces or
- Send and receive money between friends and family or
- Order a prepaid card
Step 4: Registration
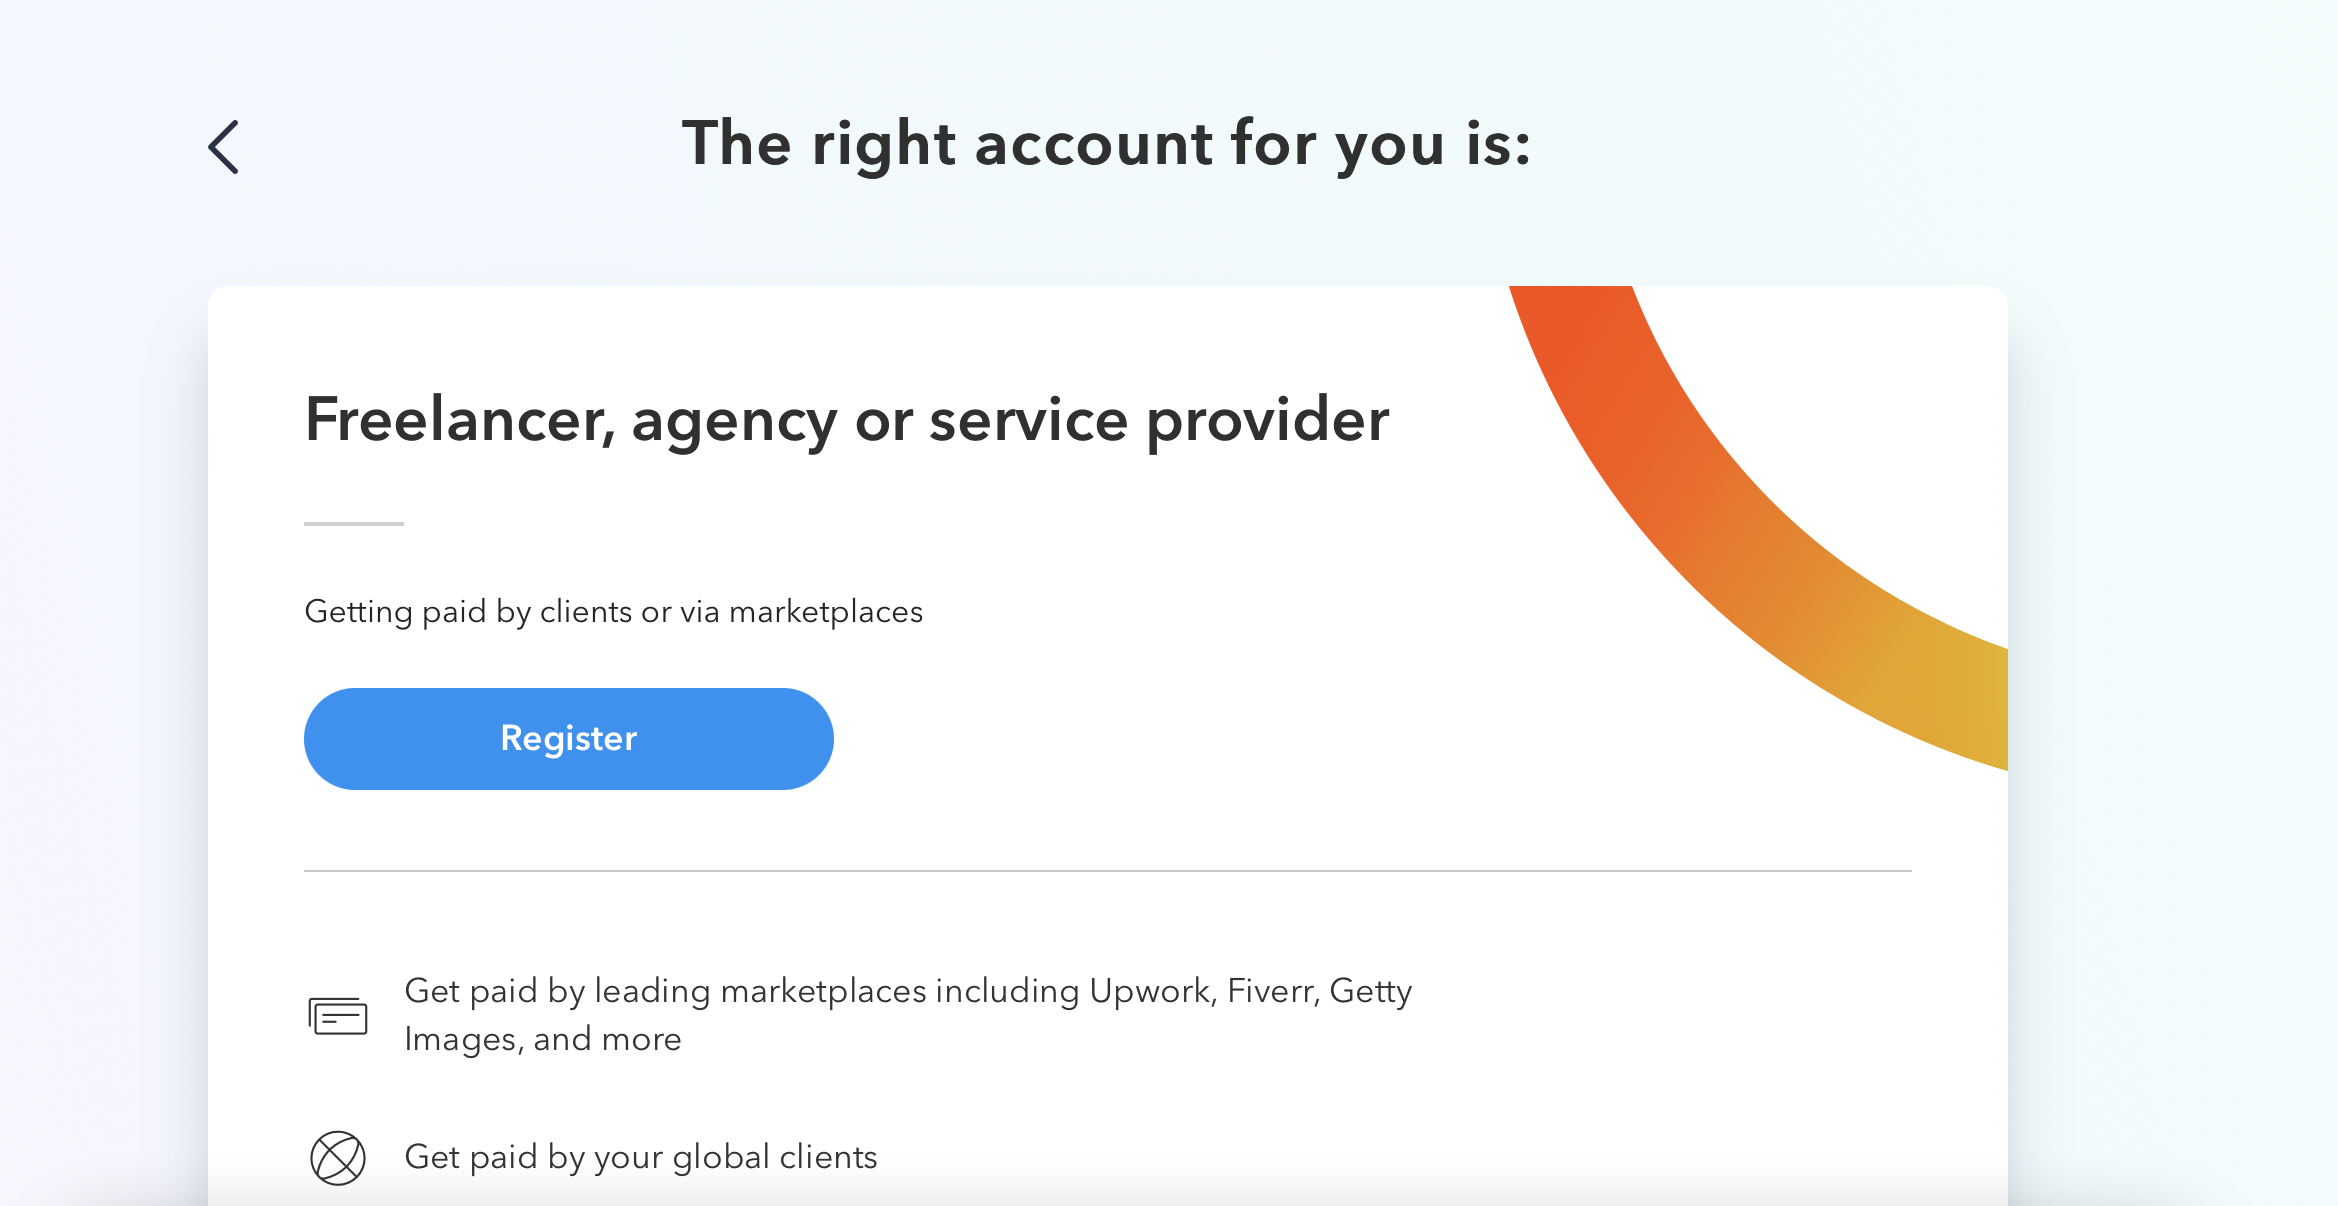
In the previous column, we chose ‘Get paid by international clients or marketplaces.’
Payoneer chose the best account for our purposes:
- Get paid by leading marketplaces including Upwork, Fiverr, Getty Images, etc.
- Receive payments from my clients worldwide
- Withdraw your earnings to a local bank account at low rates
- Withdraw funds from ATMs
- Pay your vendors and subcontractors
Now’s the time to register! Click the Register button.
How to open a Payoneer account? Step-by-step guide
Step 5: The registration process
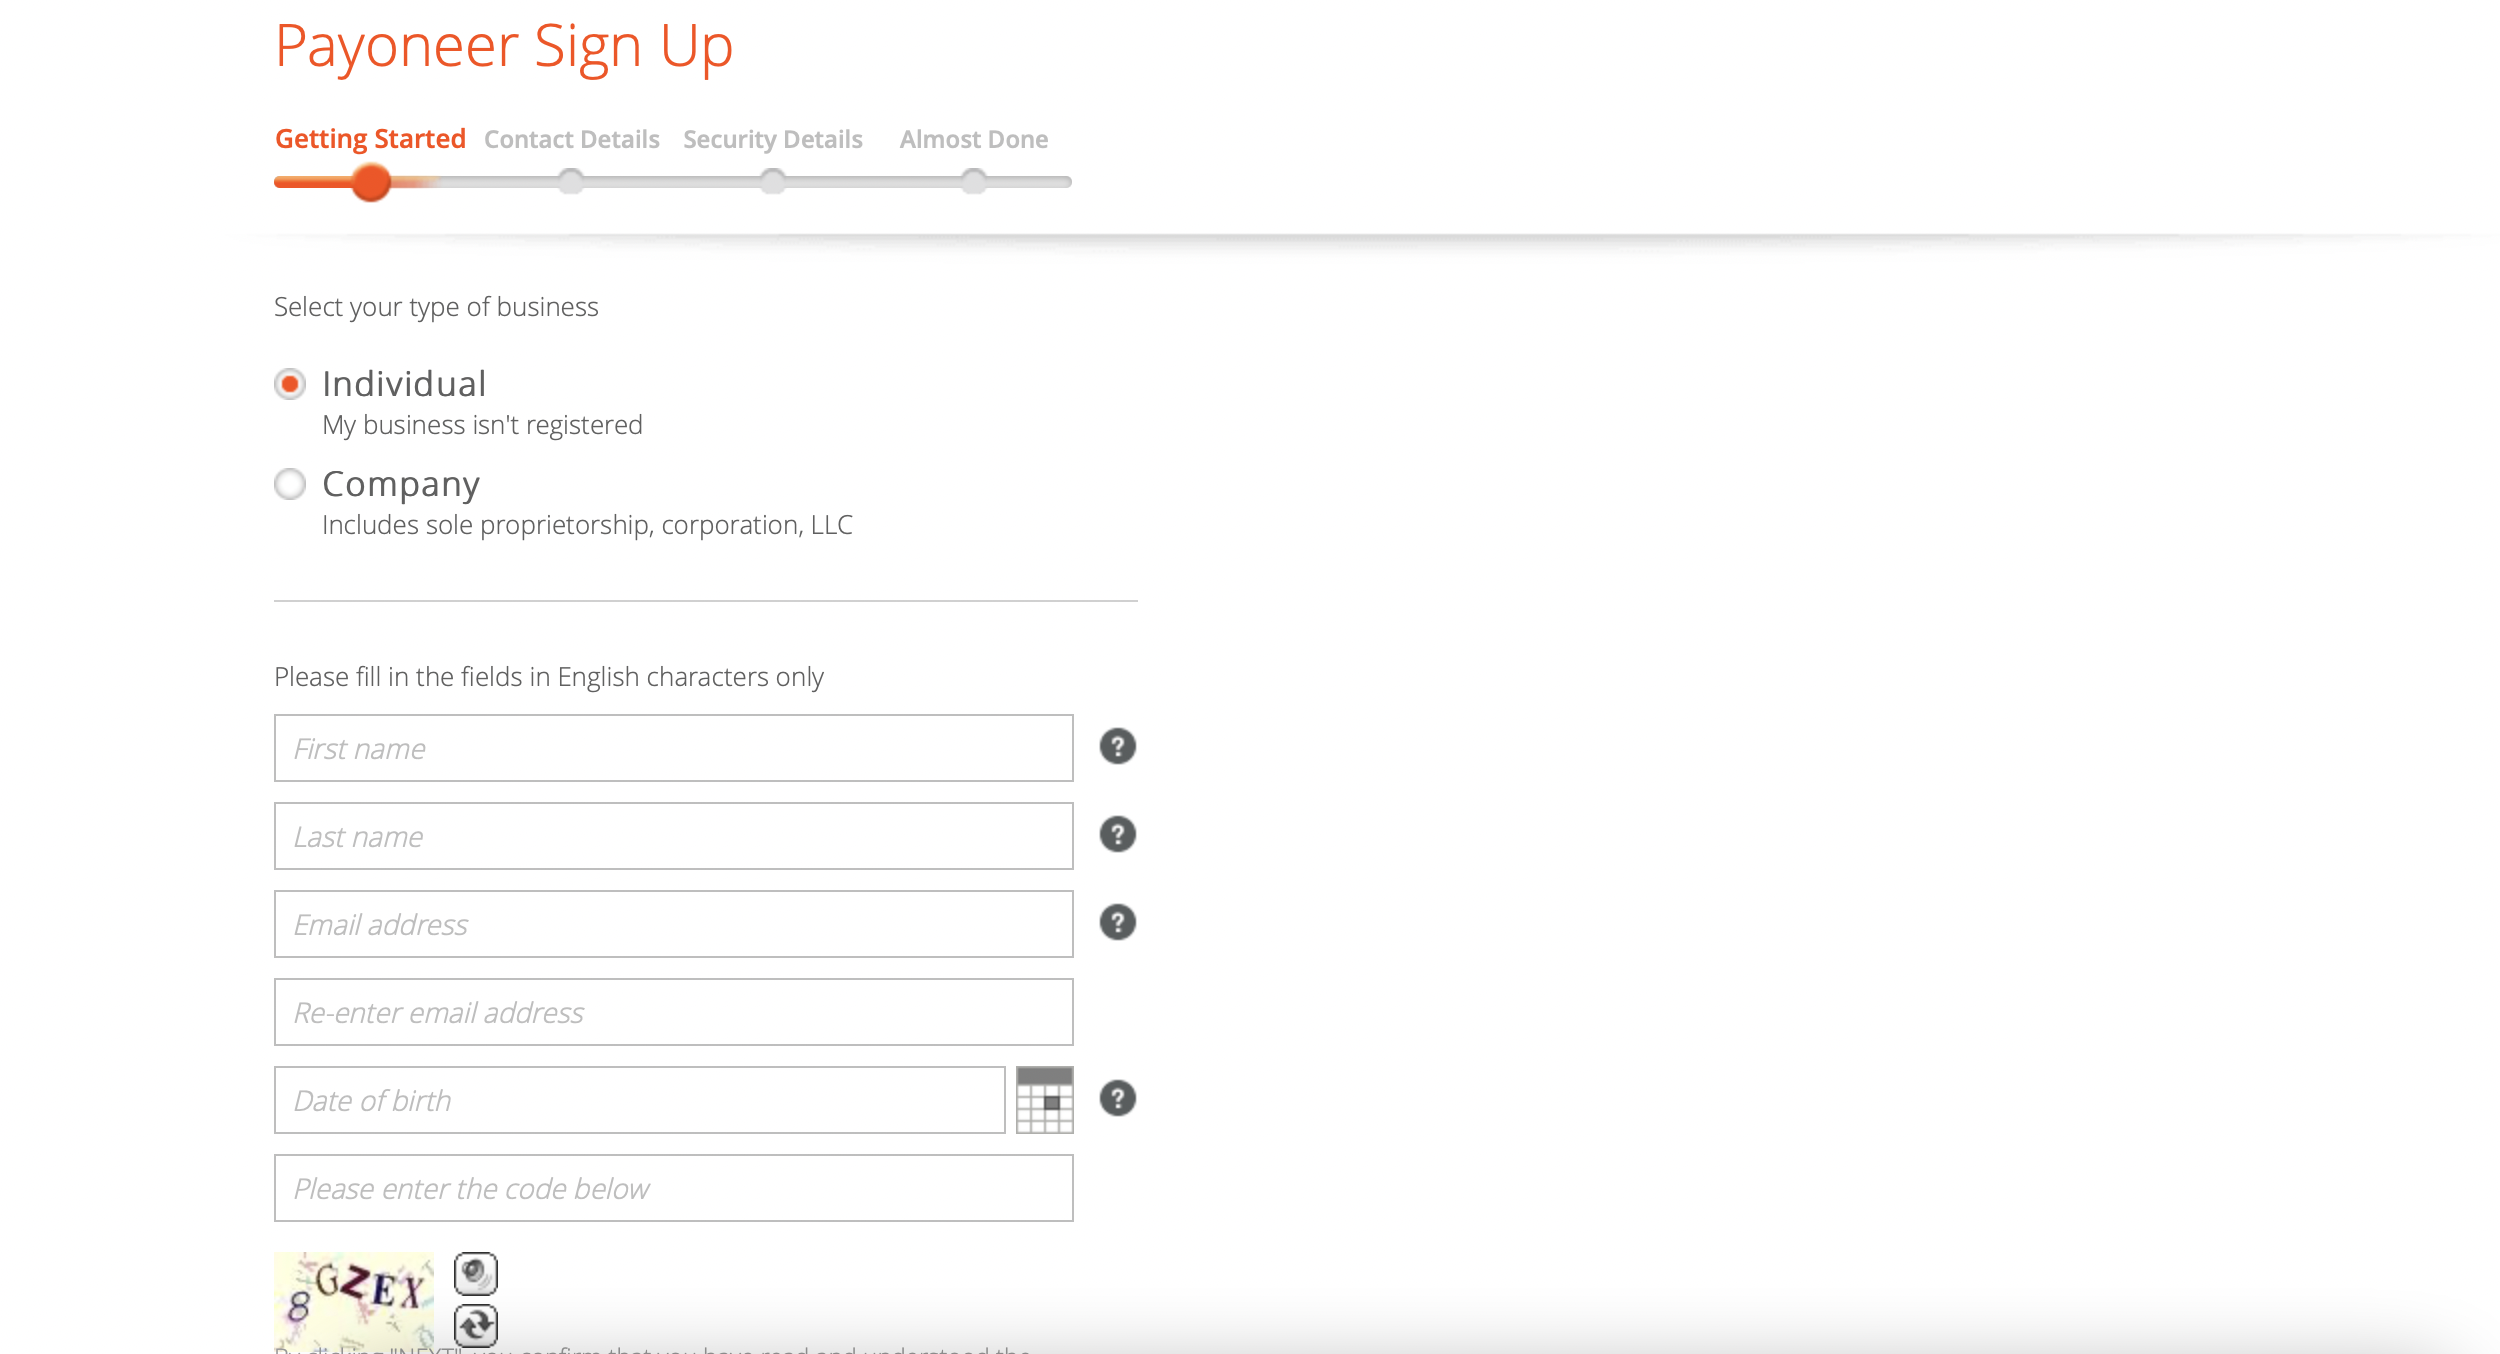
The registration process has 4 steps.
- Getting started
- Contact details
- Security details
- Almost Done
Step 6: Getting started
In the Getting Started box, you must:
- Choose the type of your business (individual or company)
- Full name
- Email address
- Date of birth
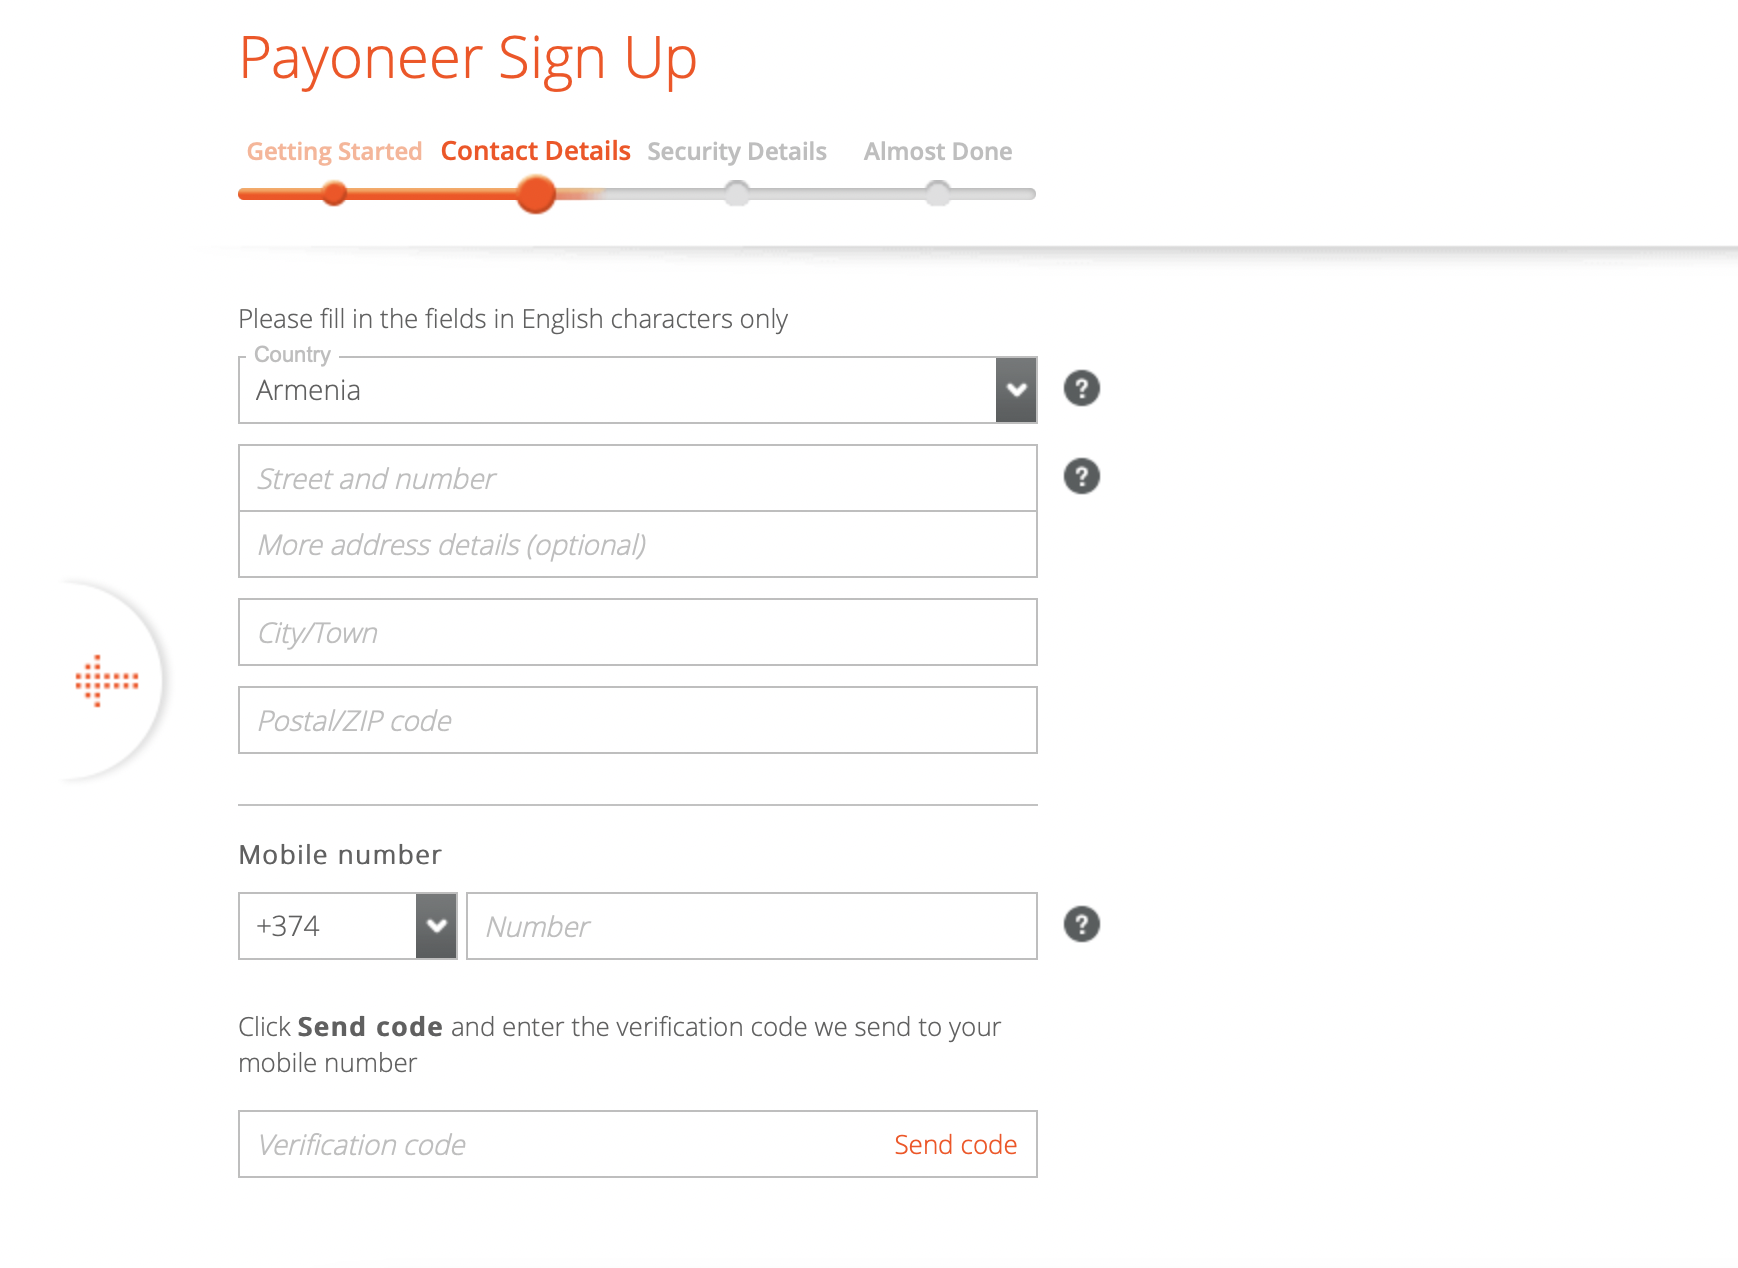
Step 7: Contact details
In this field, enter your contact information:
- country/city
- address
- phone number
On the phone number, you entered you will receive a code, which must be entered to continue the registration.
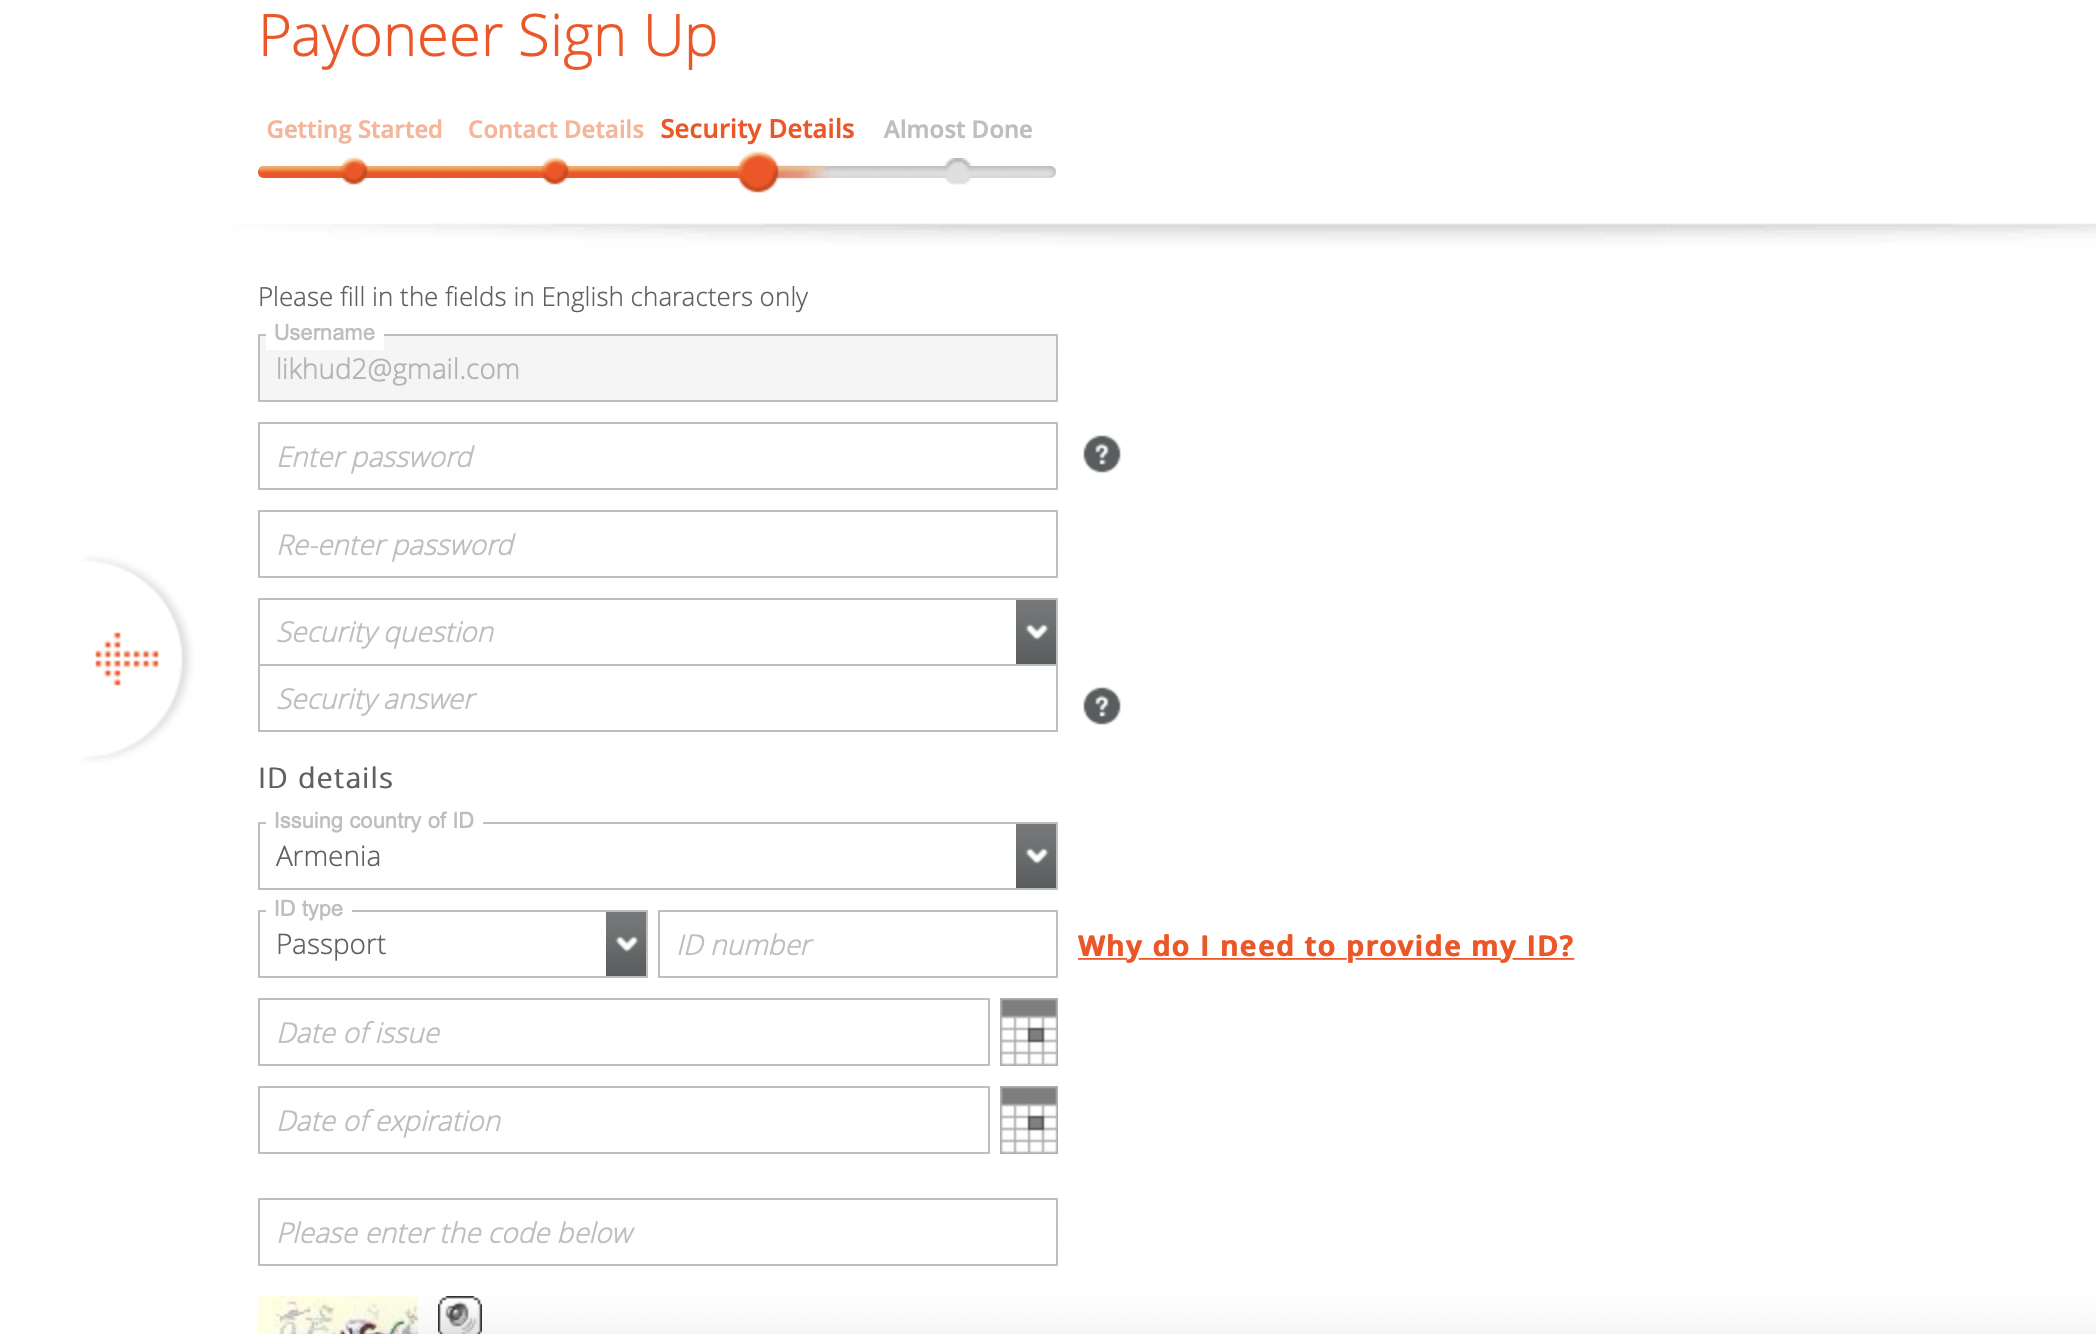
Step 8: Security details
Then, in this block you must enter all the data for your security:
- password
- question/answer
- passport details
Step 9: Almost done
At this point, you need to select a bank account for withdrawal that belongs to you or your company.
First, select what you need the account for:
- personal account
- Business account
Then enter the data of your bank and press Submit.
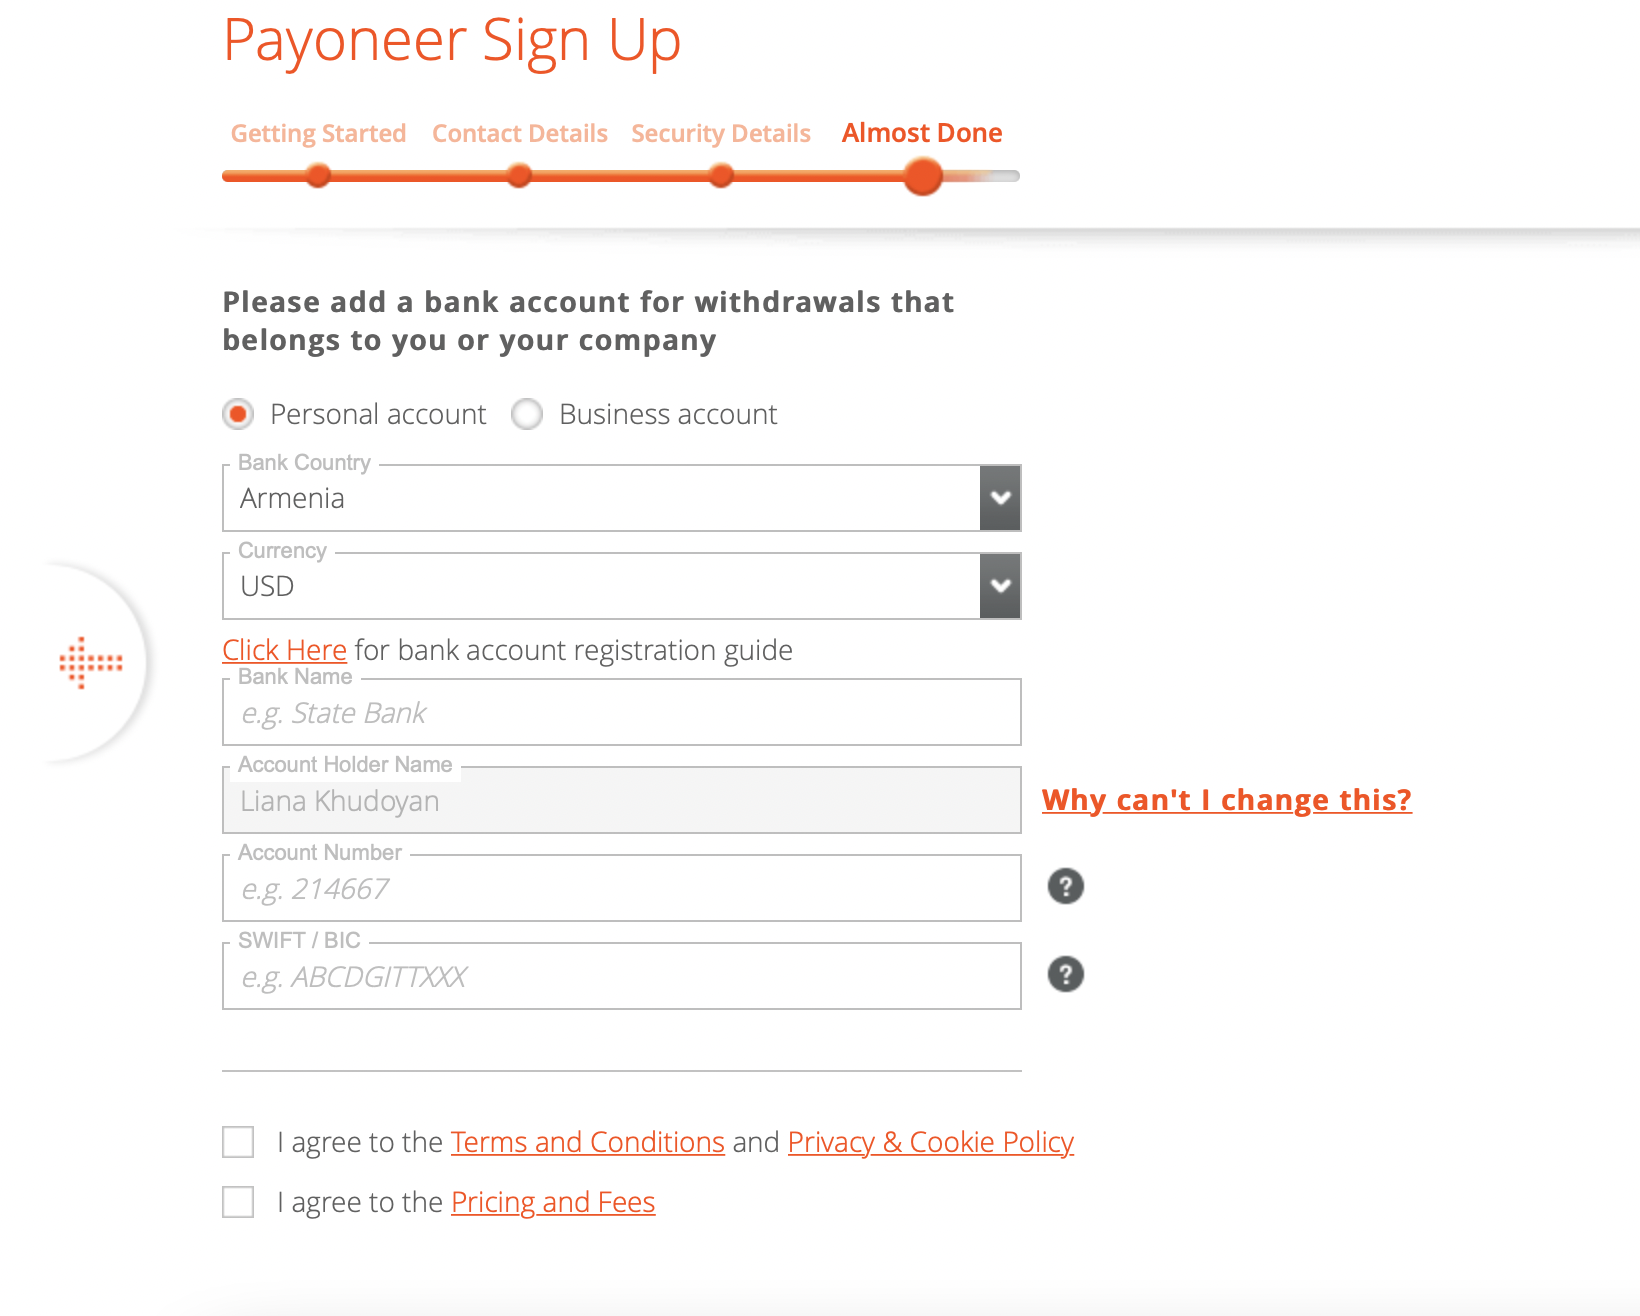
Your application is automatically sent. In 3 business days, you will receive a confirmation of your account via the email you entered earlier.
Providing necessary documents
And to complete the review process, you must always have the necessary documentation on your Payoneer account.
To do this, log in to Payoneer using your email address and password.
- Go to Settings > Verification Center.
- Here you’ll receive a notification about the required documents.
- This may be an ID, passport, proof of residency, driver’s license, electric bill, and bank account confirmation.
- Before you submit your documents, make sure that they are valid and not overdue.
- Also, the image of the document must be of good quality. Do not add cropped photos.
- Smaller images and documents of poor quality can cause additional delays in the application.
- Upload images in JPG, PNG, GIF, TIFF, and PDF formats.
- Also, make sure that the document size does not exceed 3 MB.
- In the case of multiple documents, make sure they are all completed separately.
- Review and upload the documents. Now click the Submit button.
- A message will appear on the screen stating that the document was successfully uploaded.
- Within a few business days, you will receive an email telling you that your Payoneer account has been successfully approved.
That’s it.
Stay tuned to Amaz.Markets!


